Sunday, May 25, 2014

Nikkormat FT/2 In-Depth Review

The Nikkormat FT/2 Camera is a 35mm Solidly built Semi-Professional SLR.  This camera I got for a song, along with a Nikon EM which is entirely faulty, as someone has salvaged the battery chamber out of it.
When I got this camera, it had a minor fault.  It was inoperative. The shutter was jammed, and the mirror was in its upward locked position.  That, sadly, meant that this camera was not going to be able to be used until I sent it out for service.  Unfortunately, I also did not have the money to get it CLAd.  So onto the repair forums I started searching.  That search led me to a thread regarding the self-timer and the camera completely locked up.  I learned that the self-timer on this camera wasn't the most robust, and was prone to failure.  So after I tried to remove the lever to see if I could manually release the timer that way (which caused it to slip instead) I popped open the bottom of the camera.
That's where I saw the Self-Timer gears. Using a fine flat screwdriver, I began to advance the gears, which much to my surprise, released the shutter.
And from that point on, this camera has been in service!

Now one of the first things I did after I got it back to the functional world, was clean it. It was very grimy and dirty!  I mean, not 'dirty' by the sense that it went through a dirt bath, but it had definitely seen some use and some dirty hands. So I did the usual cotton swab (Q-Tips) and a alcohol to clean it.  This way it disinfects and also penetrates the stuck on dirt for easy cleaning.
Besides, it's not like you can  submerge the thing under any kind of solution to clean it..  Then again, Iso 99% probably wouldn't hurt it, considering that it's not conductive, and evaporates rather quickly. AND you can submerge a computer board under Iso 99% and it won't short it out.. Even under power!  But that is definitely something I refuse to try.  Any particulates on that board will contaminate the solution, and could cause it to become conductive and short it out..
No thanks!

Of course, now looking at the camera in these photos, you'd wonder...  Wait, that was the first thing you did was just clean it?  Then when the heck did the leatherette fall off and it get the denim look?
Well... that was not that long ago (unless you're reading this 10 years in the future from writing it).
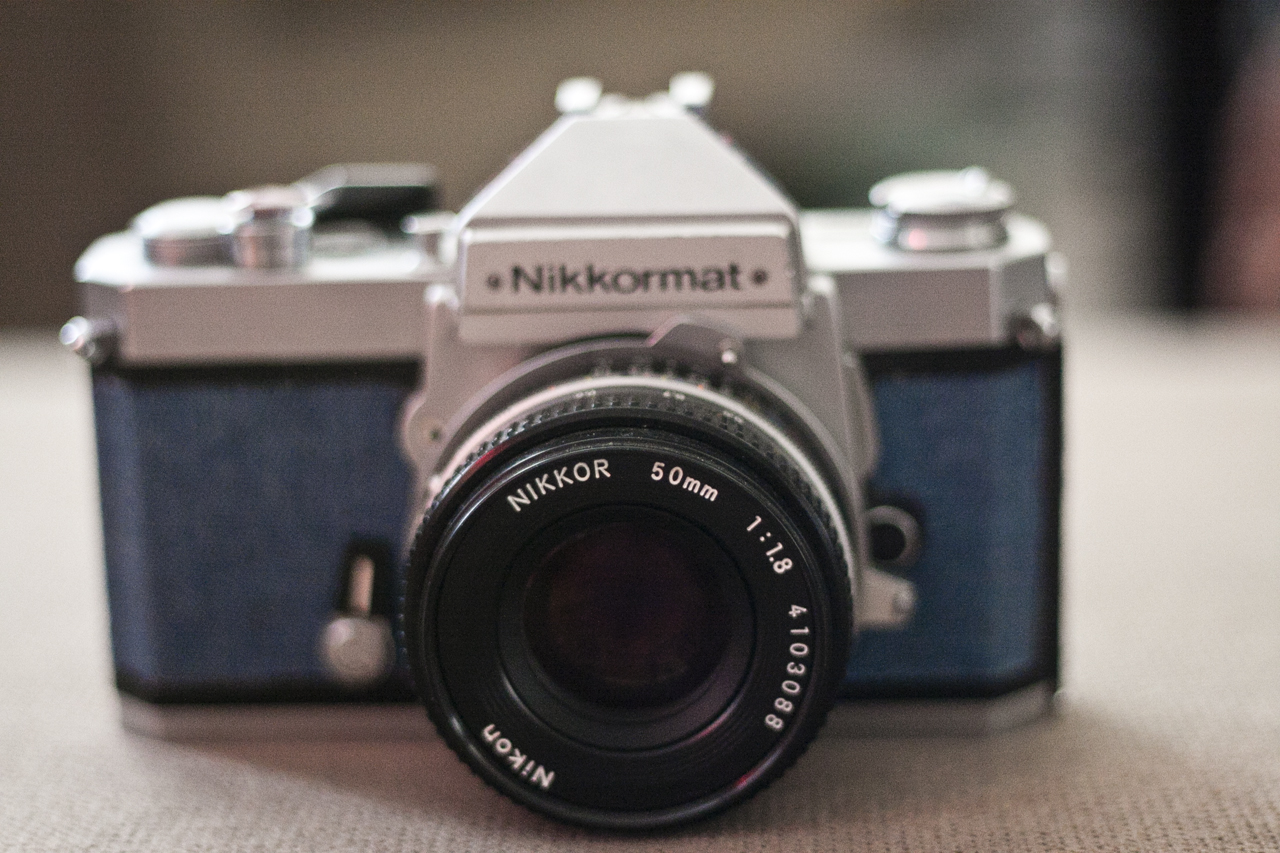
I decided that I was tired of the 'black' look it had, and wanted a change.  Well, I popped into my local Wally-Mart (Walmart) and found these denim patches.  They are "Iron" On, but I'm not about to iron a camera!  The Pentaprism is supposed to be humpy bumpy!
So I used a little bit of adhesive (the same stuff that you will see me referring to in the Argus C3 repair).  It does a great job holding on leatherette, and even Denim patches to the camera.
Barely bleeds through too!  In fact, if it does, once it dries it just peels right off. Really cool, and easy clean up!

So... Nikon, huh?   Yeah, I know, I've got more Canon cameras than your local photo store, but that's because it's a great system.  I haven't been much of a Nikon guy.... Ever!  That said, however, they do make some nice looking cameras.
You may see me joking about how Canon made no sense when they started making these Canon Nikon cameras.  I know they are different companies, and in fact, Nikon is older.  Considering that at the beginning of the Canon brand, Nikon was making their lenses for them.  But, that changed later when Canon decided to branch away from Nikon entirely, and start making their own lenses.  And to be perfectly honest, it's a good thing they did.  Canon glass is a bit better!  I'm not saying a lot better, but a bit.  Of course, if I truly want to get myself in hot water with a lot of Canon and Nikon Aficionados...  Konica had the best glass!  Yes they did.  Now I'm not comparing the Zeiss optics or even Leitz optics.  Leitz had a very soft contrast to their lenses, which actually worked very well.  I'm not talking about a soft image, not in the slightest.  Their lenses are very sharp, but the contrast is very soft in comparison to a Zeiss lens.  This is what gives Leica their legendary look.  Where as Zeiss is considered to be some of the sharpest and best glass, it is also contrasty in comparison to Leitz glass.
That's not a bad thing! Out of Focus transitions on Leitz and Zeiss is amazingly smooth. When was the last time you looked at a shot on a Rolleiflex or Hasselblad and said, "Man, that bokeh is nasty!"  I'm referring to the 'big' 5 camera makers.  Nikon, Canon, Pentax, Konica (Minolta) and Olympus.  Konica has some phenomenal glass!  It is just too bad their cameras were shyte in comparison!  I have a Auto S2 rangefinder that completely locked up and jammed for no reason.  I was loading it, and when I went to load in the film, the winder jammed and it has not worked since.
POS!
Of course, this isn't a "LETS BASH KONICA" post, since it is about a Nikon camera that.. well, has a weird name!  The Nikkormat. I don't really know the history with the name, but hopefully someone will inform us all in the comments below.
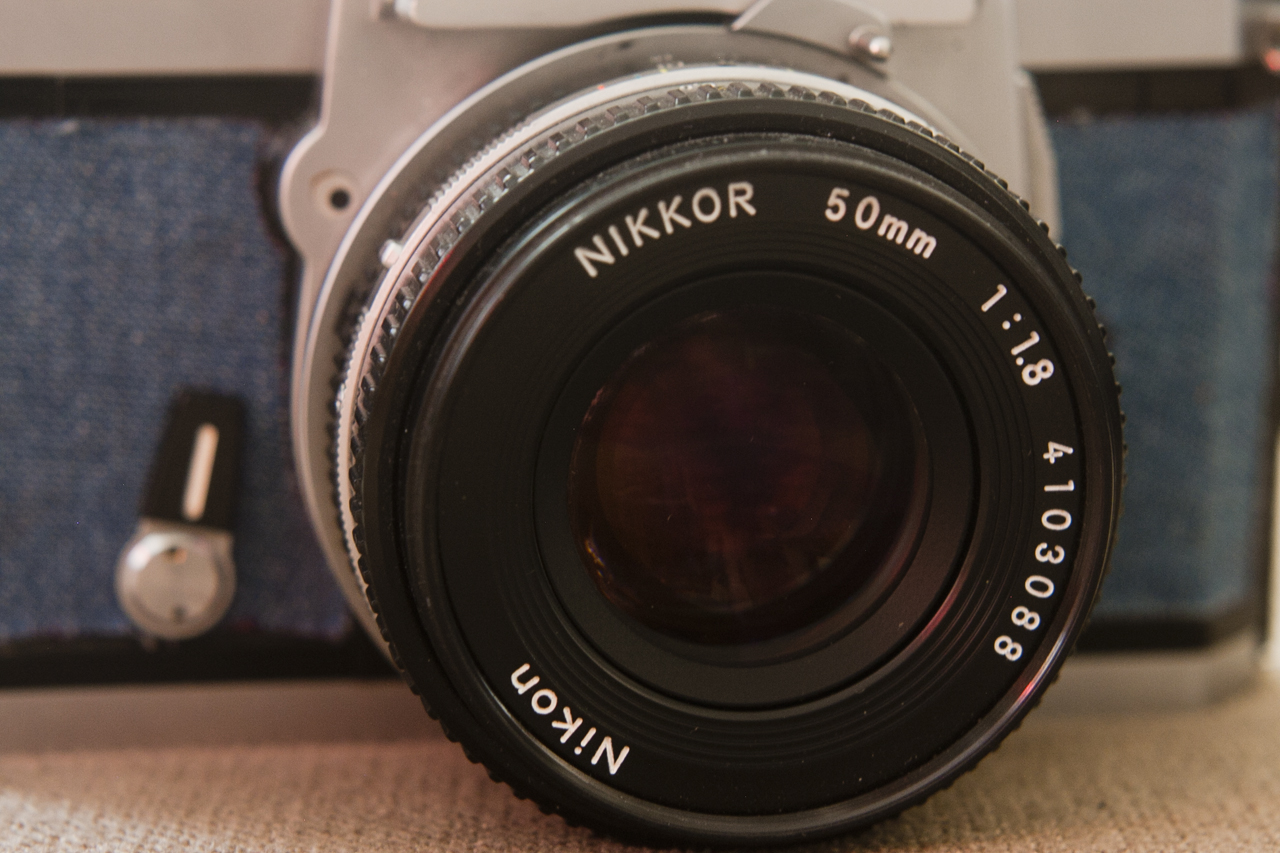
Also, a lot of people believe that this camera can only be used with a Pre-AI lens.  You know, the ones with the Forks on it? Yeah, Auto Indexing.. Well they're wrong!  It can take all the lenses that you can mount on a Nikon and use them.  Err, I wouldn't mount a Crop sensor lens on it though.  Unless you like small image circles, and no aperture control.  But aside from that, I can use my Nikon lenses (I have 3) on this camera without any issues at all.  I mount, then adjust the "Fork" pin on it, start the meter, and push the little button to give me "stop down" metering.  Works every time!

So lets start with an actual review on this camera.

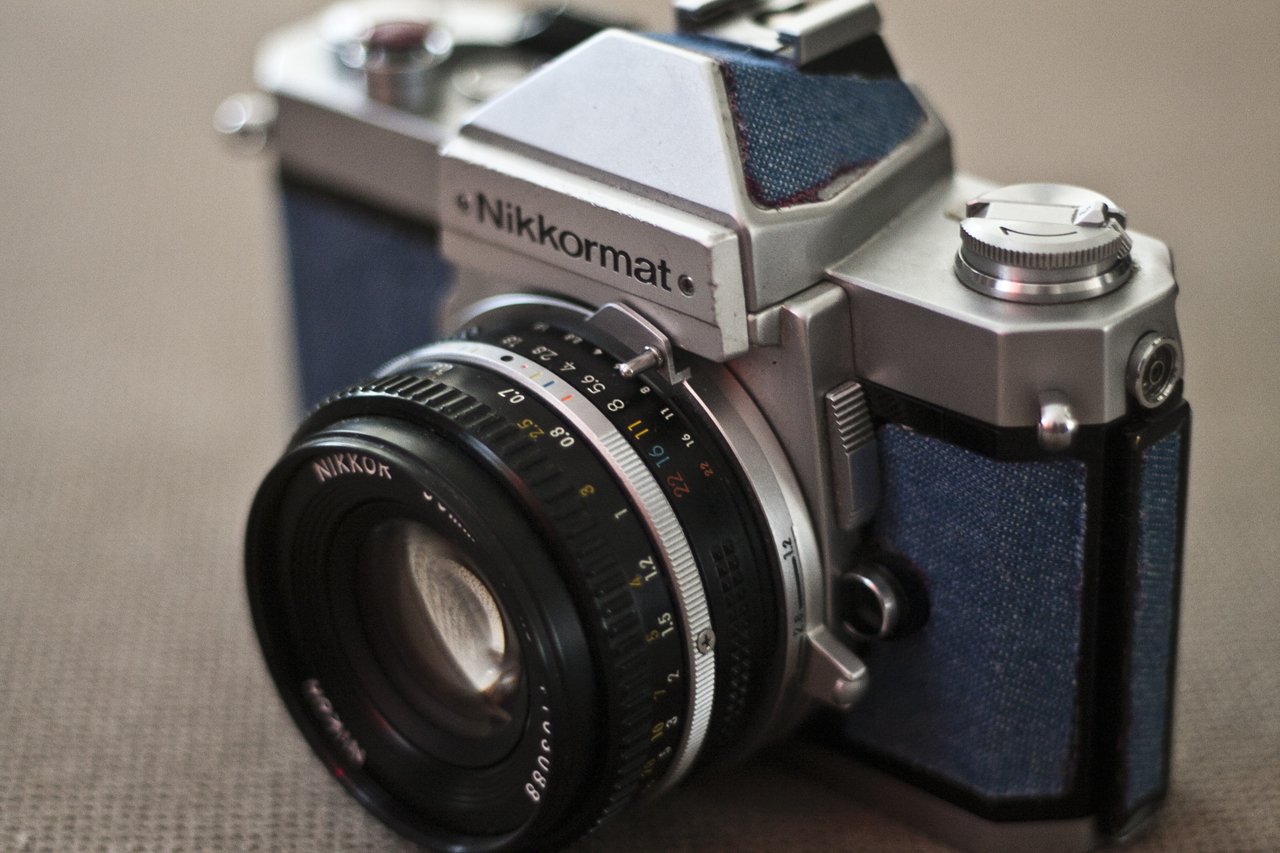
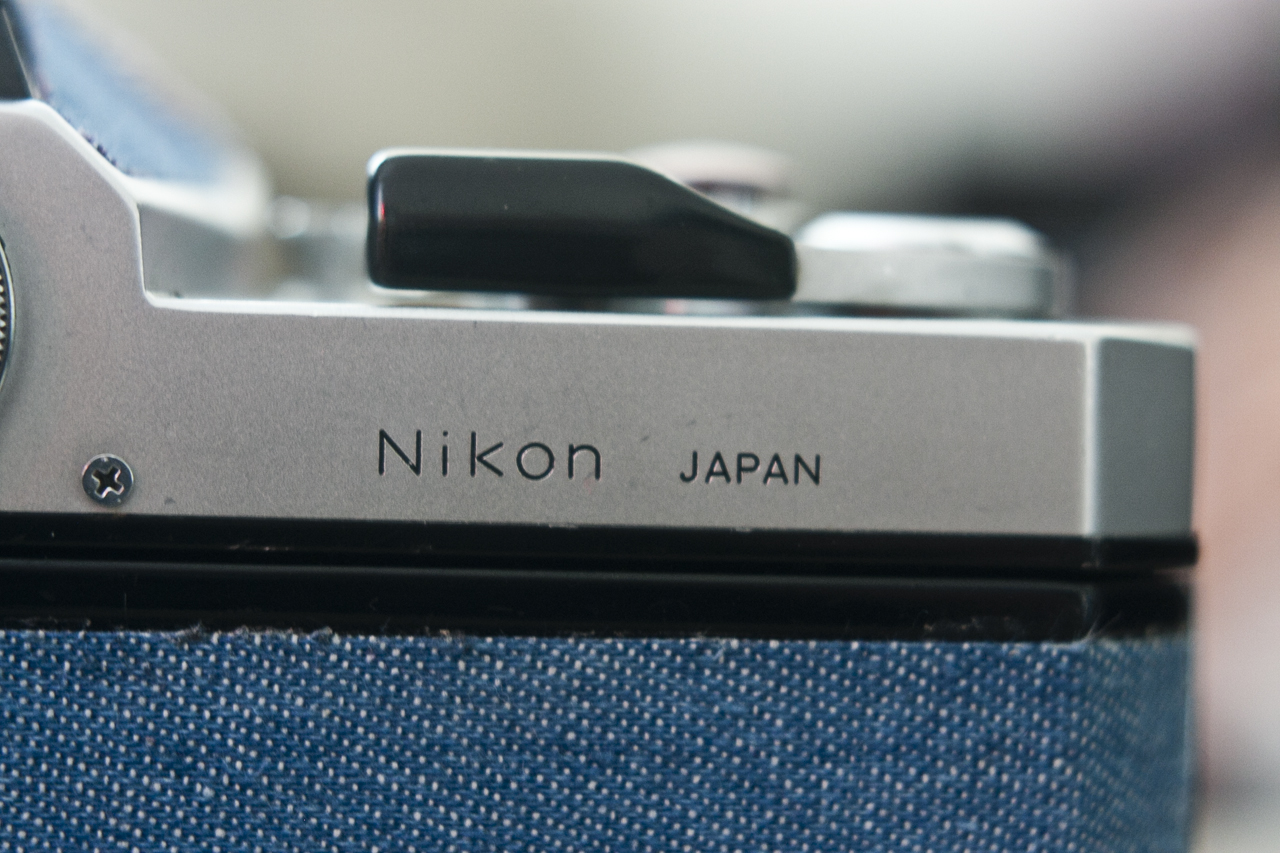
Looking at the top, in the photo above, you will see the (Starting on the left) film rewind, exposure meter (External), pentaprism hump with X-Sync flash hot-shoe, Stop-Down button, film plane indicator, Film Frame counter, shutter release, and finally the winder arm.

The X-Sync PCPort right below and beside the rewind takes all standard PC-Port plugs.
The rewind knob is just like all others, flip out crank, and an arrow to tell you to rewind in this direction to prevent the film from jamming up while rewinding.
Now raise your hand if you've rewound the film the wrong way...
Come on. Don't be shy.

Wow.. that's a lot of people!  Come on, can't you read an arrow?

Then there's the exposure window. Don't worry, you don't have to look at this window. Ever! It is fine if you're using a RF (Retrofocus) lens and metering through the lens with the mirror up and out of the way, since that is the only way you can use a RF lens.
With the mirror up and out of the way, the viewfinder is BLACK so you would have to use the external window for metering. But I would more recommend a hand-held or sunny ƒ/16 type metering instead, as I just don't see how using a tiny window for metering is of any use when compared to using a much easier to read needle on a hand-held meter.

Speaking of the meter, it actually has a pretty nifty way to activate it.
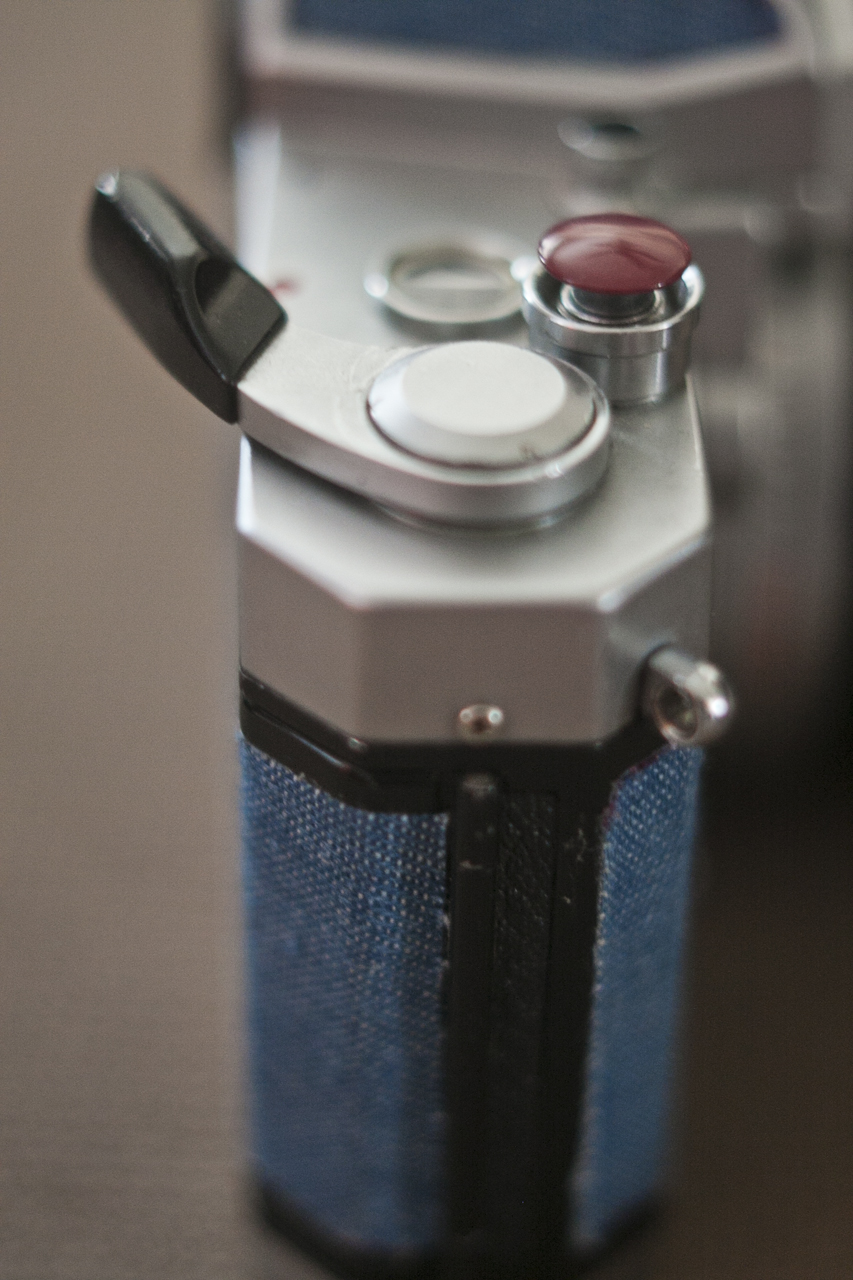
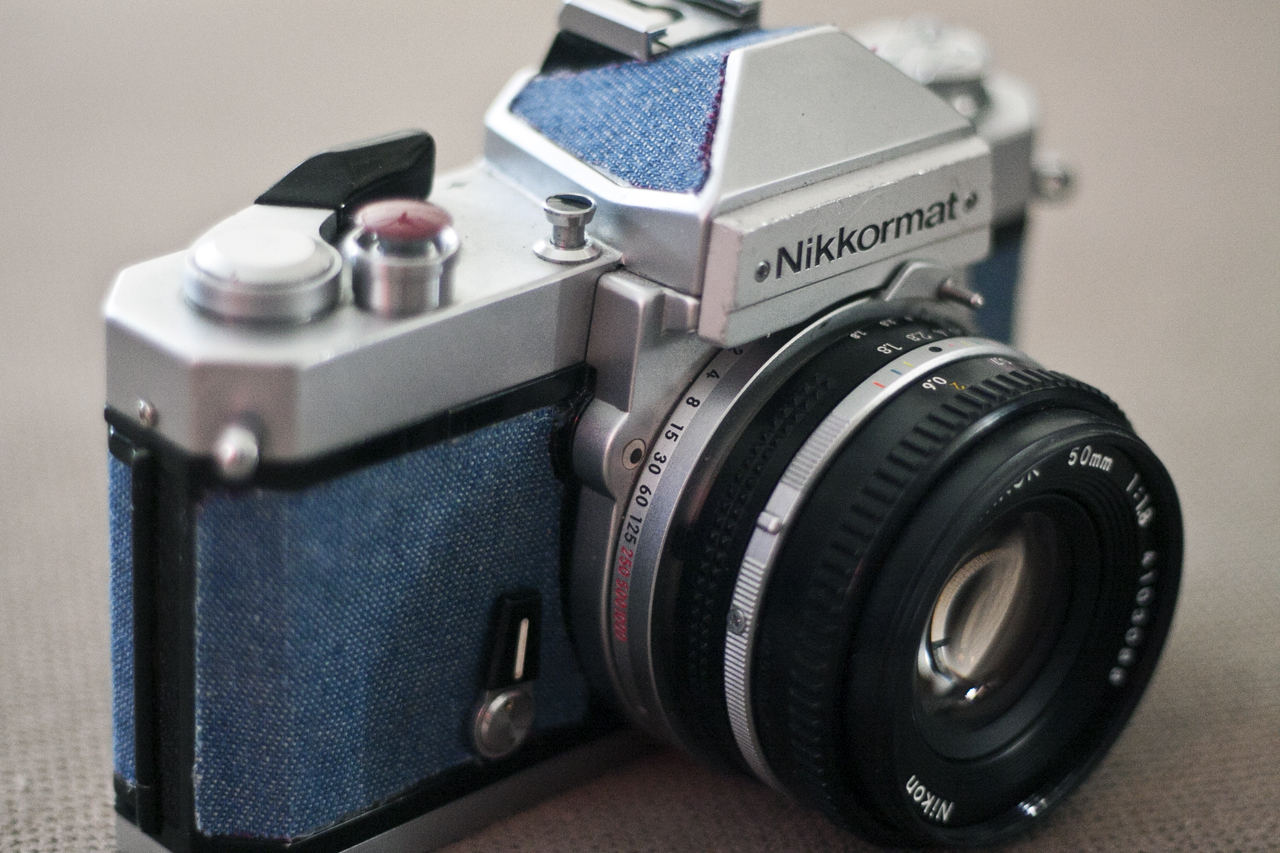
No funny switches, buttons or levers in odd places on the camera, but the one right beside your thumb. Yup!  The advance lever!
Simple flip it out of the 'rest' position, and the meter turns on!  It's that simple!
Just remember that when you are done metering, or leaving the camera for an extended period of time, tuck the lever back, or anticipate a dead battery pretty soon!
Looking beyond the advance lever, the shutter release.  I have one of those interesting "Soft-Release" shutter buttons in mine, just for a softer touch.
I do find they make a difference! The tiny release (normally) is not so difficult to use, but the soft-release makes it far easier to find when you're not looking at the camera but through it, and much easier to press.
Especially if you have fat fingers, which I sometimes feel that I do. I may not really have fat fingers, but I'm sure there are times where everyone feels they do.
Oh.. You don't? .. Oh you're just getting back at me for the arrow comment.  I see..  Oh.. you are not getting back at me about the arrow comment, you just don't have fat fingers.  How nice..  Good, well they must not hurt you when you're picking your nose!

Next the "Depth of Field" button.  Since I am using AI and AI-S lenses on my Nikkormat, I don't really have much choice but to use Stop-Down metering.
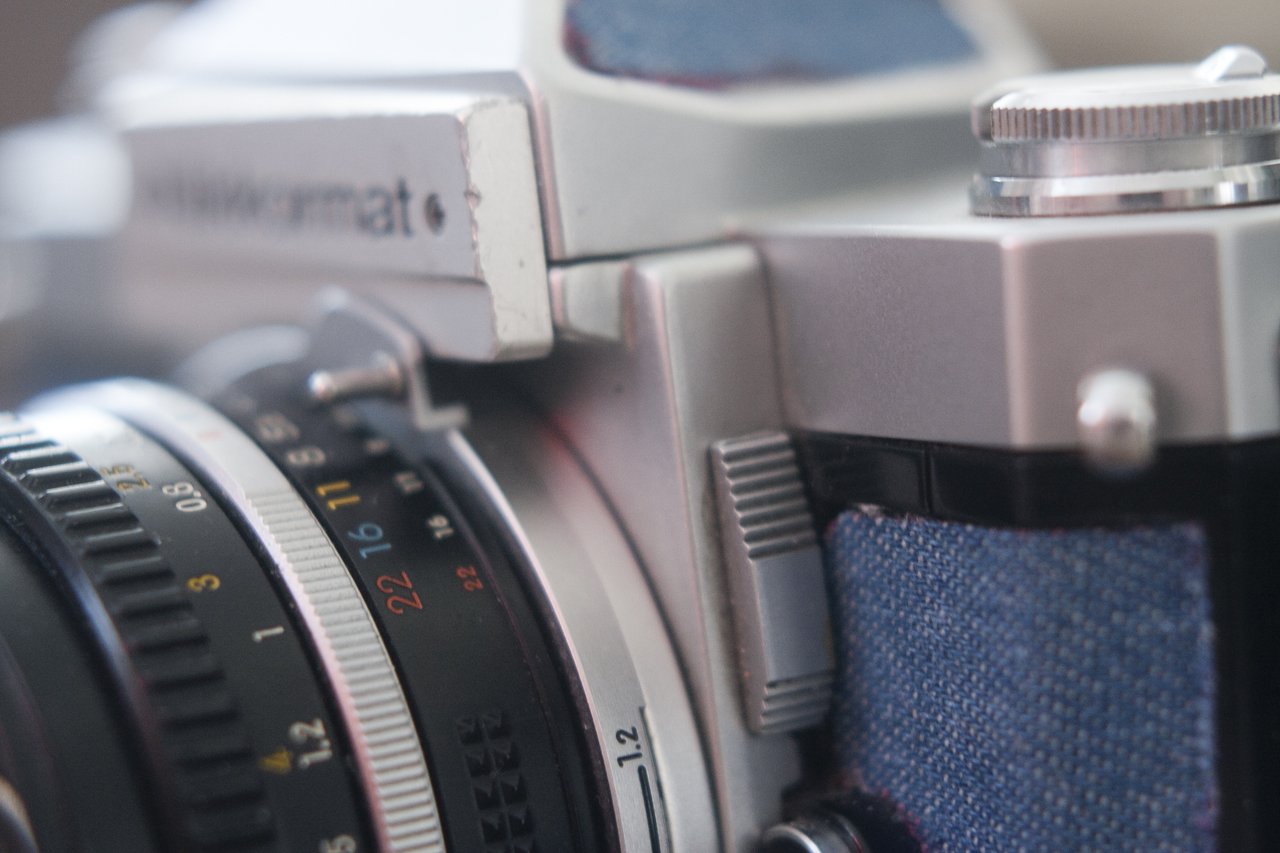
The advantage to Stop Down metering is that you also get a "Depth of Field" preview, so that you can see what is going to and not going to be in focus when you throw the shutter release.
Also, the image you see is pretty much what you get. You'll get to see how the bokeh will look, and whether the pinpoints of light in the trees behind are helping, or hindering, the image.
A little bit of work, and perhaps recomposing, and they should help.  Just remember, make sure there are no weird appendages growing out of your models head!  You don't want them to have a tree branch sticking out of their ears when you trip the shutter.  If you're working TFP and you give them one of those, they'll either find it mildly amusing, or you might end up shunned by them for later work, if you just happened to get along well.

Also, the shutter speed indicator dot is located at the front of the camera.  I don't use that dot to know what the shutter speed selected is, as you can clearly see it in the viewfinder, but again, if you're using a RF lens, you cannot see the viewfinder, as it will be quite dark!  So make use of this dot, it might help save your photo!  Not to mention, you scroll back up a bit, you'll notice that the speeds above 1/125s are red.  Why is that?
Well, that's simple.  See, at every speed below 1/125 (including 1/125) the shutter is fully synced up with the flash. But when you start shooting at 1/250s and above, the shutter is no longer synced to the flash, and you will get banding across your image.  So if you're using flashes or strobes, stick to 1/125s or slower.

The mirror lockup and indexing fork are the next stop on the tour.  The mirror lockup switch (located just above the Lens release button) will flip the mirror up and out of the way, which is good for LONG exposures to prevent mirror slap and camera shake, or to use those RF lenses I keep mentioning. Since those RF lenses usually use a lens element that actually protrudes into the camera body, if you don't flip the mirror up before mounting it, you can't actually trip the shutter.  The mirror will crash into the back of the lens, possibly damaging it, and even possibly breaking the mirror!
Best case scenario, it just jams the shutter until you remove the lens and it can complete its travel.
Worse case scenario, a broken mirror and a big ding in the rear element of the lens.
Make sure you flip the mirror up and out of the way when using those lenses!

At the bottom of the camera now, this is where we find basic information on it.  The "Made in Japan" stamp, the battery door, tripod socket, and the film-speed indicator.  I know most times it is located at the top of the camera somewhere, instead of here but this is where it is on this camera.
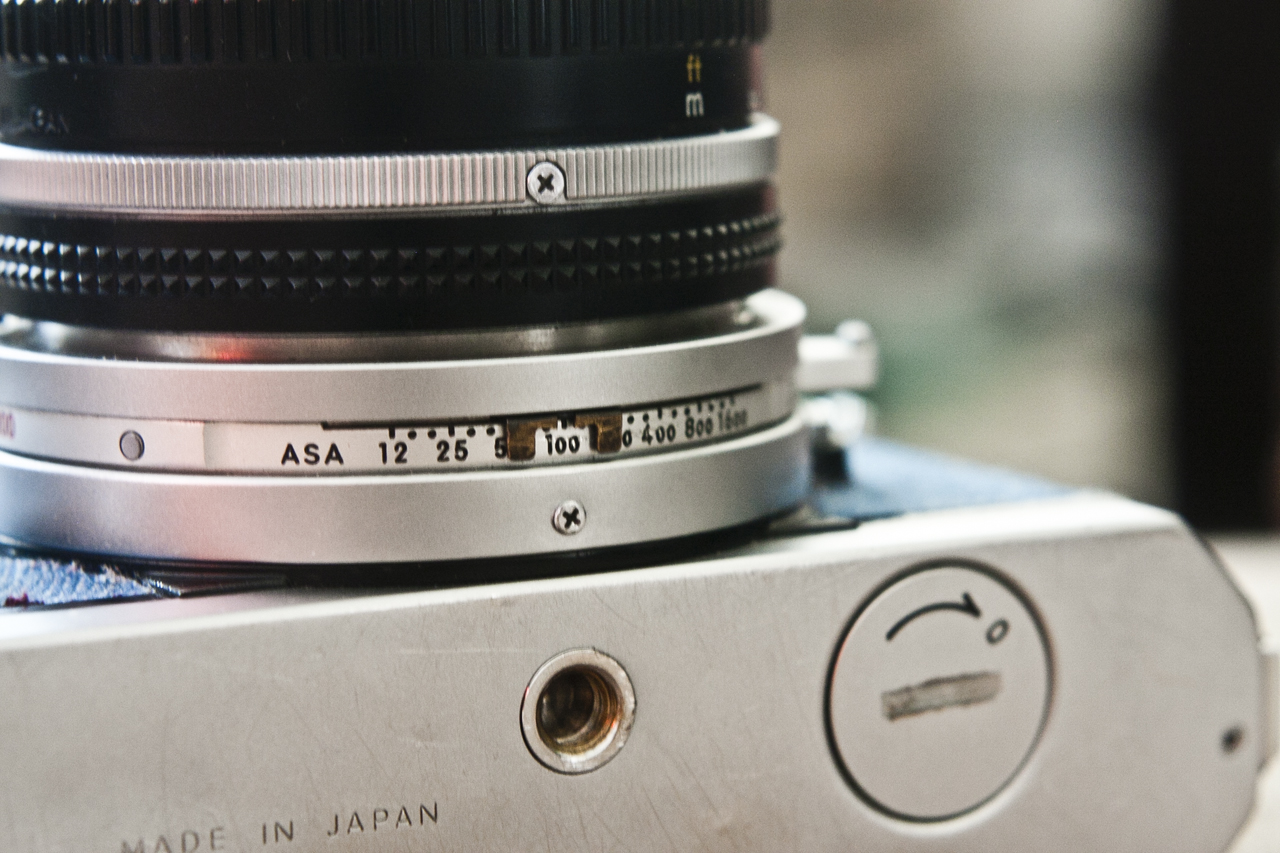
I know, they are just weird!  Heaven forbid you bite your names (Get your fingers out of your mouth!) you won't be able to adjust the film speed.
At the end of the shutter speed dial lever there is a tab.  Pulling out this tab will unlock the film speed indicator nub. While pulling the tab out, you can then slide the film speed indicator nub to the proper film speed of the film loaded.  See what I mean about biting your nails?  It's a terrible habit!  Yes yes... Nervousness, and boredom.  I get it, but you know how much bacteria can be found under your nails?  Yuck!

And finally, the front of the camera.  Lens mounted, self-timer switch in the "UPWARD" position (except mine is broken).

So why Nikon?  You've been a staunch Canon supporter for years, and you now own a Nikon as well?

Actually, I've owned this Nikon for a few years now, and have put it through its paces from time to time.  It is a very solid little camera, heavy too, and can take a beating.  When they talk about a camera being built like a tank, this one is one of those cameras.  It is, quite literally, built like a bloody tank!  It's solid, heavy, metal, and well designed (save for the self-timer).

I have enjoyed using it, and will continue to enjoy it.  Of course, now that I have recently (see not reading this 10 years in the future or more and thinking.. Recently?) got a Nikon F90 camera (autofocus) this Nikkormat might spend a bit more time on the shelf at times.  But when I want simplicity, and a solidly built camera that might hurt if you drop it on your toe, I'll reach out to my shelf, and grab my Canon FTb or Praktica L2!  (Yeah take that Nikon owners, bwahaha!)

No, I will continue to use this camera.  It is a lot of fun to shoot with, and you do get the "Journalist" type look when you are carrying it around.  Unless I happen to have my big bright Neoprene "NIKON" neck strap on.  Then I know I fit in with the Nikon crowd.
Loud.. Obnoxious, and gaudy!

So... How about some sample images from this camera, right?  Alright I can give you some of those..

EOS ELAN II
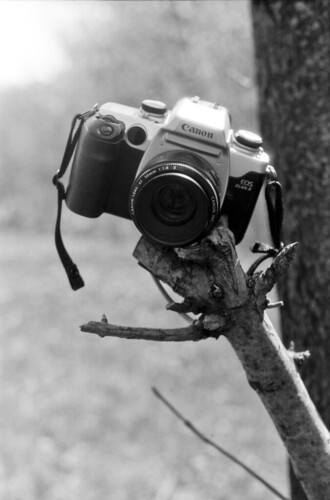
"Canon EOS ELAN II" Nikkormat FT/2 - Nikon 50mmƒ/1.8
Polypan F film

If Only It Were Beer
"Wish it Was Beer" Nikkormat FT/2 - Fuji Superia 800 - Nikkor 50mm ƒ/1.8

Sunnyside Up
"Sunnyside Up" Nikkormat FT/2 - Sigma 75-200mm ƒ/3.5-5.6 - Fuji Velvia 50
Kiss & Tell
"Kiss and Tell" - Nikkormat FT/2 - Sigma 75-200mm ƒ/3.5-5.5 - Polypan F Film
Rundown - Explored May 27 - 2012
"Rundown" - Nikkormat FT/2 - Tokina 28mm ƒ/2.8 - Polypan F Film
'Click'
"Click" - Nikkormat FT/2 - Sigma 75-200mm ƒ/3.5-5.6 - Polypan F Film
Tech Specs;

Nikon Nikkormat FT/2 35mm Single-Lens Reflex camera
Frame Size: 24mm x 36mm Full Frame captured on 135 film
Mechanical Release Vertical Travel Metal shutter curtain
Single Button Cell PX675 Silver-Oxide 1.5v battery (Original Nikkormat FT uses older 1.3v Mercury Cell) For the meter
CdS cell TTL Meter using a "Match the Needle" type metering system
Nikon Pre-AI Bayonette Mount
Shutter speeds of 1s through to 1/1000s + Bulb w/X-Sync at 1/125s
Weight... Heavy! Don't expect to be able to hand-hold this camera all day without some hand cramping later.  Also, make sure you have a comfortable neck strap, or you might find that you're neck gets sore too.

Until next time, keep those shutters firing!

Stay tuned as we take an in-depth look at....

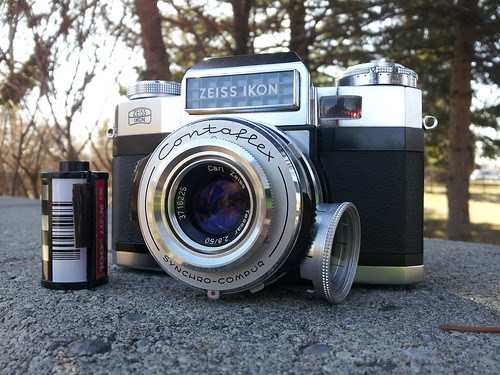
The Contaflex Super-B....!
Zeiss Ikon Contaflex Super-B

Saturday, January 4, 2014

The CANON EOS ELAN II


Released in 1995, it was Canon's latest entry into the Semi-Professional film camera market.  Sold as a kit with the 28mm-105mm lens, it was the successor to the highly popular Canon EOS Elan.
Sold also as the EOS 50, and EOS 55, depending on market, also had a "E" designation for "EYE-Travel" focusing.  Which meant you could actually allow the camera to focus on what you are looking at.  This was a feature that never really caught on.  I haven't used it, personally, but have read that it wasn't always accurate, and was more of a gimmick than anything.
The body, a Gold colour plastic molded body, with an action grip, makes it rather light weight, and easy to hold for long periods of time.
The camera is actually a good way to help get a digital photographer into film, as it is reminiscent (well the other way around actually) of many digital SLR cameras.  The dials are all in similar places, it has all the same "controls" and even has a similar weight.
The camera employs Infrared assist for autofocus, which is that big red dot, which means it'll be able to focus easier in low-light.  Of course, using some Canon Speedlites, it'll use a "burst" fire off the flash to assist in the autofocus.
The design is actually based off the Canon T90.  In fact, many modern digital SLRs are based off the same design.  It was the T90 that set the bar so high and was so comfortable to hold that so many manufacturers have copied and used on their designs.
So lets go into the camera specifics.  It is a 35mm full frame Single-Lens reflex camera, with multiple different preset settings, such as MACRO mode, Sports, Landscape and Portrait modes.  It also has the usual settings of Program, Shutter Priority AE, Aperture Priority AE, and full manual.  As well as A-Depth AE for a specific depth of field, plus full AUTO mode.
The other settings are with metering.  There is center weighted average, Center Weighted linked to the central focusing point, and 6-zone full frame evaluative metering.  I usually use Center weighted linked to the central focusing point, considering my preferred choice is SPOT metering.
The Self-Timer button also sets the camera to trip the shutter after 10 seconds, which is good for self portraits (selfies), or as I use it for, long exposures without a remote up to 30s on a tripod to give the camera a better chance and settling, stopping it from shaking after pressing the shutter release.
The [CF] section on the mode selection dial is for custom features.  I have, as of yet, never used this function on this camera as of yet.  But maybe one day I'll actually find a use for it.
Now lets flip around to the other side of the camera. On this side we see another dial, which allows the settings for the focus mode.  One-Shot focusing, which means that it'll focus and lock on the subject, but will not change the focus point until you release the shutter button, or move on to the next shot.
AI focusing is Auto-Focusing, and will lock out the shutter if focusing is not achieved in Auto-Focus mode, and will keep the the focus on the subject.
Then there is AI Servo focusing, which will change the focus on the subject as they move through the frame.  I use One-Shot as my preferred method, but have used AI Focus.  I haven't really seen much of a difference in AI Focus VS One-Shot.
The other function on this side is the shot mode. There is Multi-Shot (not Multi-Exposure) also known as continuous mode, or single shot exposure.
I try to keep it on Single-Shot, as I have accidentally held the shutter release in and wasted a few frames all in a row.  Oops!
The next functions we see on the top of this side is the FLASH popup button.  The flash is found on the Pentaprism Hump, which gives it a more square appearance, which is reminiscent of the Minolta XE-5 camera.
Next is the "Lock-AE" button, and custom Function setting button, as well as the Focusing Point selection button.
The LCD screen displays all the information from shot to shot, such as 'IR' receiver, EI Bias, Battery, frame #, flash on or off, mode, aperture value and shutter speed.
So lets take a look now at the very front side and we'll see the IR focus assist beam, shutter release button, and scroll wheel.  That scroll wheel is used to adjust the shutter speed.

Under the AF assist beam is another little red window, which is the IR receiver for the Canon IR Remote control.
I personally prefer the scroll wheel on the front of the mount instead of at the top, as you have to move your finger off the shutter release button to adjust the wheel, where as if the wheel is at the front, you can adjust the wheel using your middle finger and if an opportunity arises while you adjust the settings, especially using an AE mode, you can quickly trip the shutter without moving your finger and possibly missing the shot.
Also, having a second scroll wheel at the front can have different functions.
But discussions like that are far too late, as the camera model is already long time cancelled in production.
Continuing on the tour of the camera, the front shows the "brand" Embellishment on the front of the camera Pentaprism hump, model name, and lens release button.  The camera does not have a stop-down Depth of Field preview button, which is odd for them to exclude as most semi-professional models had that feature on it.
Modern Consumer cameras, such as the Canon EOS Rebel XS (1000D) which is a entry level dSLR has the DOF preview switch on it, while this camera, an advanced amateur/semi-professional series camera does not.
Another oddity that Canon left out on this camera.  But it was progress, at least at the time it was.
Now we focus on the back of the camera, and go into a bit more detail on this part.  The back has another scroll wheel, which you can see this type of design on many newer dSLR cameras that Canon has released, such as the Canon EOS 40D.
This wheel will adjust the EI Bias in different AE modes, or the aperture when you are in Manual Mode.  The on-off switch, like on the 40D is the switch to turn that dial on and off.  Similar to the 40D, the switch will turn the dial on, and you can switch it off to prevent any accidental adjusting of the aperture in manual mode, or accidentally +/- adjusting the EI bias.  The small protected button is the film rewind button, so it'll allow you to rewind mid-roll.
The other button is the select button to change different functions, such as Red-Eye reduction, ISO speed, Auto-Exposure Bracketing, Flash Power, Mutli-Exposure, and IR release on or off.

Now about usage on this camera, it is actually very simple to use.  I have found this camera to be very easy to use, to hold, to handle, and to keep in hand for long periods of time.  It has really nice balance, and quite well built ergonomically.
The Meter is quite accurate, and have found it to meter Negative and Positive films perfectly!

"Padlocked" - Panchromatic 2223 film
Helios 44/2 M42 w/Adapter

"Pinecone" - Panchromatic 2223 film
Helios 44/2 M42 w/Adapter

"Shriveled Leaves" - Panchromatic 2223 film
Helios 44/2 M42 w/Adapter

"Pinecone and Bokeh" - Panchromatic 2223 film
Helios 44/2 M42 w/Adapter

"Fresh Wine" - Velvia 50
Canon EF 28-90mm

"Velvia Sunrise" - Velvia 50
Canon EF 28-90mm

"Bridge Over" - Provia 100F
Canon EF 28-90mm

"My Hat" - Polypan F 50
Canon EF 50mm

"Master Lock" - Polypan F 50
Canon EF 50mm

"Bench" - Polypan F 50
Canon EF 50mm
"Paddock Park" - Polypan F 50
Canon EF 50mm


The Canon EOS ELAN II

Specs;

35mm Single-Lens Reflex
Canon EF EOS Optical System Mount
Vertical Travel Focal Plane Plastic shutter curtain 30s to 1/2000s electromagnetically controlled
Center Weighted Metering System
24mm x 36mm full frame on 135 film
2CR5 Li-Ion battery

Also has the Battery Speed Grip BG-50E option that you can purchase.  They are actually very inexpensive today.

Hope you have enjoyed this post.

Until next time;
Keep those shutters firing!

Stay tuned as the next post will be focused on the Nikkormat FT/2 35mm SLR.

Monday, October 21, 2013

Pentax Spotmatic In-Depth

The Pentax Spotmatic SP.  In my eyes it is probably the most regarded and versatile 35mm SLR I have ever used.  Sure, there are other cameras that have interchangeable viewers and screens, but they were designed more as a professional camera instead.  Like the Exakta, or the Nikon F2, or even the Canon F1.  The Spotmatic is the longest running line of cameras. Beyond that of the Nikon F3, which was a very long running Professional camera.
The Spotmatic had a few refinements over the years.  From the "Value" entry model, the SP500, with a top speed of 1/500s marked shutter speed, but a 1/1000s top shutter speed (unmarked).  I know that sounds confusing, but the way Pentax made a value model was simply by changing the SP1000 speed dial to show 1/500s only.
I have two models.  The SP, which was the original model released in 1964, and the updated model, which was the SPII.  The difference between the SP and SPII was actually the addition of the Hot Shoe above the viewfinder.  The original SP had a pair of Sync ports on the front only.  FP Sync and X Sync.  To use a on-camera flash, you would need to purchase a clip-on Accessory Shoe and plug the flash into the sync ports.  Because of this, though, Pentax, with the Honeywell branding, added an On-Camera hotshoe.  Thus adding the SPII to the marketplace.
As cameras became more and more sophisticated, soon the advent of open aperture metering starting to appear, instead of the Spotmatic's StopDOWN Metering.  With M42 lenses, this required the lens to have 3 pins on it to make the electrical contact with the mount.  There was only a handful of lenses to allow this, and as such, the idea was then abandoned by Pentax and moved on to a new mount.
The K Mount, which is a Pentax Spotmatic F with a new mount, no FP Sync, and open aperture metering using a K-Mount lens.
The Spotmatic name may have ended after the introduction of the K1000, but the innards and the camera was still the same.  Mechanical shutter, 1.35v (1.5v on the K-1000) battery for the meter, and a top speed of 1/1000s.
The K-1000, when introduced, also had an offering for a M42 to K mount adapter, so that those that already had their M42 lenses, could then mount them onto the K-1000 for an easier transition.
The other noticeable difference between the K-1000 and the Spotmatic was the removal of the Self-Timer.  After 12 years having the Self-Timer, Pentax removed the clockwork timer, in favor of a screw in accessory timer, which can be pricey, if you don't do your homework on finding a working one that is not at ripoff prices.
You can see the Helios 44/2 58mm ƒ/2 Zeiss Biotar copy lens affixed to the camera in this photo.  The early model Helios 44/2 lenses were actually just rebadged Zeiss Biotars, since they used the Zeiss Glass while the supply for it lasted.  Similar to the Zeiss Ikon Contax III cameras which were rebadged as Kiev III cameras.
The early Helios lenses are the highly sought after glass, but the "newer" lenses are excellent!  Most of the original Helios 44/2 lenses were M39 mount for the Zenit M39 SLRs, not to be at all confused with M39 LTM Rangefinder cameras, which could not use M39 SLR Lenses except for MACRO photos.

The metering is controlled using an On-Off switch that uses STOP DOWN metering only.  Most people would Focus, Stop-Down and Meter.  Using a PRESET lens, like the Helios 44/2, the lens would need to be manually stopped down, while with other M42 AUTO lenses, it would stop down automatically when you turn on the meter, and when you actuate the shutter.
It was also a good way to get Depth of Field Preview, which the K-1000 was also lacking.
You can also see, which was later removed in the K-1000, the Sync Ports, which is the FP and X sync.  The K-1000 had the sync port moved to the metal plate beside the viewfinder on the front of the camera.
Looking at the back of the camera with the back open you can see the very dependable horizontal travel cloth focal plane shutter.
I have no idea how many shutter actuations this model has gone through, but since 1964 to today, it has to have gone through a lot, and it still works.  Perfect!  The shutter was a little sluggish when I first bought it 4 years ago.  Well, not really sluggish, but would release the second curtain a little early, causing banding on images using faster shutter speeds.
Needless to say, it has since corrected itself, and it is worked flawlessly.
The only problem, though, is that the camera's meter no longer functions.  It has completely failed and will need to be recalibrated, especially to work with 1.5v Silver Oxide batteries.
Like almost every single Pentax film camera I know, the winder, speed, release, and counter cluster all looks the same.  The speed dial also has the ASA selection dial on it, which is adjusted by lifting the outer ring and turning like you're adjusting the speed of the shutter.
Winding is a quick-action thumb advance lever which can be advanced in a single stroke, or in many small strokes.
The auto-reset counter is housed inside the winding arm with a window showing the current frame.
The shutter release button is a simple long-depress inside threaded shutter release button with a single-action release.  Unlike newer cameras, the release button only controls the shutter release, and not the metering system, which is done by the switch.
Personally, I don't mind having to meter by flipping a switch, but it is quite simpler to meter and release the shutter with one button.  But that will come in the 70s.

Honestly, this is a camera every photographer should have had to shoot with.  I like the K-1000, absolutely, but find that the K-Mount doesn't have the versatility of the M42, nor the range of lenses.  Plus, the prices of said lenses is skyrocketing with Pentax dSLRs able to use those old K lenses, and the M4/3s cameras.
This camera is simple, elegant, and very rugged.  Solidly built, and requires no battery to operate, other than the meter.
Has a great shutter, and even the sound is lovely, bright and big viewfinder, and is fairly easy to focus with using the MATTE Fresnel screen.  The center prism screen is very accurate, and would be even easier if it had a split-image rangefinder type screen, but it works.

Excellent camera, for anyone looking to get into photography, or go to a simpler camera.  It is an amateur's camera, yes, but that doesn't mean it can't compliment a professional photographer's system.  In fact it can easily fit in right beside a Nikon F3, or a Canon F-1.  Heck, even a Hasselblad or a Bronica can be complimented with this camera giving a faster system for those candids instead.


Tech Specs;

Pentax Spotmatic SP/SPII
Frame Size: 24x36mm Full Frame
M42 Thread Mount
Stop-Down Metering using a TTL CdS cell powered with a 1.35v Mercury Cell
Horizontal Travel Cloth focal plane shutter 1s to 1/1000s +B 1/60s X-Sync & FP-Sync
Hot-shoe X-Sync added on SPII
Quick-Wind ratcheting Thumb Wind Advance lever

"Apples and Bananas" - Pentax Spotmatic SPII
Carl Zeiss Jena Tessar 50mm ƒ/2.8
Polypan F 50ASA

Stay tuned as I go in-depth with the Canon EOS Elan II

Until next time, keep those shutters firing!

Wednesday, September 18, 2013

Kodak's Rolleicord - The Reflex I

When Franke and Heidecke released the Rolleiflex back in 1931, they had set the bar very high for TLRs.  It has been copied, and copied, and copied some more, but the Rolleiflex is still a very prestigious and versatile camera.
By the mid-40s Rollei had a model known as the Rolleiflex Automat, which basically denoted that it could count the frames without the ruby window.
In the mid-40s, Kodak released their first Twin-Lens Reflex camera, the Kodak Reflex I. 
Unlike the Rolleiflex, it had 80mm ƒ/3.5 Anastigmat (Tessar type) lenses to help combat Vignette, while the Rolleiflex had 75mm lenses.
The taking lens, and the viewing lens, on the Reflex TLR were exactly the same, helping save in manufacturing costs and camera costs, as they did not have to had two different lenses to be manufactured for the production of the camera.
Of course, Kodak did copy, somewhat, the Rolleiflex design in that they used a MATTE screen for focusing, which is considered to be rather dull, and hard to focus with, by many photographers.
Focus is achieved by rotating a geared helical which moves the upper and lower lenses in and out in tandem, keeping the focus even with the two lenses.
Located around the taking lens (lower) is the shutter and aperture select levers.  The shutter is a Kodak Flash Kodamatic 200 shutter, with speeds from 1/2s up to 1/200s, including BULB and TIMED, and aperture settings from a wide ƒ/3.5 to a narrow ƒ/22.
It uses a five-bladed iris, with some impressive Bokeh, not to mention some very impressive out of focus rendering.
As mentioned about the Rolleiflex doing away with the Ruby Window, you can see Kodak did not do away with it.  In fact, every model medium format Kodak Camera I own or have used has a ruby window.  Even the great Kodak Medalist, which has a film counter, still has a Ruby Window.
The big difference here, though, is that Kodak has incorporated a Flip Lever to open and close the window, which should only be opened when you are in subdued light. 
When the camera was introduced the films were not as sensitive as modern films today, so when using this camera today, the flap over the window is very important!


But, of course, speaking of film, this camera takes 620 film, which is now obsolete, but is the exact same size as 120 film.  In fact, you can use 120 film on a 620 spindle in the camera.
I personally usually unload the 120 spool, reroll the film without a spool, and pop it into the camera.  Of course, this is all done in the dark, and it will then be rolled onto a 620 take-up spool afterward.
There is little to say about the Kodak Reflex I TLR, other than the fact that it is a very fun camera to use.  It is fairly light-weight, considering the all-metal body, no bakelite here.  The M/F flash bulb setting is easily set on the bottom slider of the camera (under the Taking Lens) with a COCKING lever for the flash sync, which is rather odd.
The shutter release and cocking lever is integrated into the same lever, with it being slid upwards to cock the shutter, then back down all the way toward the bottom to release the shutter.
Similar to the Rolleiflex cameras, those that don't have an auto cocking shutter with the handle crank.
The viewfinder is fairly dim, but with the Reflex II that is corrected.  See, Kodak did something no one else at the time did.  They used a Fresnel screen for their model II, and it wasn't until years later that Rollei did the same thing.

So in short, this camera is a treat to use.  I have used it with B&W and even E6 film.  I have been told I am very brave for using it with E6 as with older cameras, the shutter may not work properly, be off timing, and over-expose the images.
Well, my model has working shutter speeds from 1/25s and up, and even B and T work, but anything below 1/25s does not.  It either sticks, or clicks away at full 1/200s.
The only shortcoming of this camera is the shutter.  It really should be faster, and could be faster.  The Supermatic shutter on the Medalist, which is of similar era, is up to 1/400s, as is the Supermatic shutter on the Speed Graphic.
But, that is neither here, nor there.
The lens is very sharp, and renders the out of focus area very well, giving a smooth transition. 
I have not noticed any swirly bokeh, but then again, I've never been able to get any, even with my Helios 44/2, no matter how hard I have tried.

I would highly recommend this camera to anyone who is looking for their first, or a second, TLR.  Granted, you may want to spend a coin or two extra and go for the Reflex II instead, as it has a better focus screen, but the Reflex I is a wonderful camera.

"Camera Talk" - Kodak Reflex I - Kodak Ektachrome

"Decisions" - Kodak Reflex I - Kodak Ektachrome

"Washing Fruits" - Kodak Reflex I - Kodak Ektachrome

"Window Seat" - Kodak Reflex I - Kodak Ektachrome
In conclusion, you can see that the camera performs very well with colour film, rendering faithful and well contrasted images.
An excellent performer, and one that I shall hope to get working for some portrait work in the near future...


Kodak Reflex I TLR
Twin Lens Reflex Camera
Kodak Kodamatic Flash Syncro 200 shutter 1/2s to 1/200s +B +T
Kodak 80mm ƒ/3.5 Anastigmat (Tessar type) Taking and Viewing Lens
Matte Focus Screen with Flip-Out magnifier
Drop Down SPORT Finder on Chimney
60mm X 60mm Frame size on 620 Roll Film
ƒ/3.5 Maximum Aperture and ƒ/22 Minimum Aperture w/5-Bladed Iris

Until next time fellow bloggers.  Keep those shutters firing!


Stay tuned for the next review on...


.........The Pentax Spotmatic